Set-up a Node, TypeScript and Jest project from scratch with VSCode debugging
I'm a software developer trying to build sustainable software using Test Driven Development. I advocate for autonomous teams, continuous learning and failing fast.
Node, JavaScript and Mocha ... ah, simpler times.
I often find the configuration settings for Node, TypeScript and Jest a little confusing. Sometimes I even find that projects that I thought were working previously, curiously start working less well.
Throw the need for debugging into the mix and I get even more confused.
Whilst many projects come with TypeScript and Jest preconfigured, I find setting a project up from scratch can help understand how things are working, which in turn can help if things start to go wrong.
My objective with this is to get a small project running, from scratch, using:
- TypeScript - as we all like types
- ts-node - because no-one likes waiting for things
- Jest - because... it's.... ok? I love Mocha, but Jest seems to be taking over...
I also want to be able to debug the working application and also debug the tests inside Visual Studio Code.
The source code for this project is on Gitlab .
Here goes.
(This assumes you are running some form or linux-y, unix-y, macos-y command line)
Create a new project folder. Run the following from the command line:
mkdir acme-project
cd acme-project
You are now in the base folder of the project. Next, initialise a project, again run from the command line:
npm init -y
This gives us a package.json file with some sensible defaults. Next we can install the key modules that we need: TypeScript, Jest, ts-node and ts-jest :
npm i -D typescript jest ts-node ts-jest
The -D tells npm that these are development dependencies and not required by the published application. Unless we are publishing npm modules, it is likely that the only way this affects our projects is in the organisation of the package.json.
We'll also install a little helper module, npm-run-all for making our scripts a little neater:
npm i -D npm-run-all
We can now set-up some basic npm scripts.
Visual Studio code has a neat trick that allows you to open a folder in the application from the command line:
code .
If you don't have this, then you can open the project folder via Visual Studio Code.
Edit your package.json file and replace the scripts entry with:
  "scripts": {
    "build": "tsc",
    "app": "node dist/app",
    "start": "run-s build app",
    "dev": "ts-node src/app",
    "test": "jest"
  },
We have five enties here: tsc, build, app, start, dev and test.
build- we will transpile our TypeScript using this, but it also gives us access to the tsc command more generally, which we will shortly use.app- whilst not configured yet, our final code will be generated in adistfolder and the entry point will beappstart- this uses one ofnpm-run-all's commands:run-sto run two other npm commands,buildandappin sequence. We didn't need npm-run-all for this, but the result is neater.devwill allow us to run and our application and have it automatically rebuild when we make changes. It usests-nodeto achieve this.test- will run our jest tests.
The build script gives us access to tsc. tsc if the primary TypeScript command line tool. One of the functions for which we can use tsc, is to generate a TypeScript configuration file:
npm run build -- --init
(Note the extra --. This tells npm that command line arguments will follow and should be passed to the script. --init is for tsc, not for npm)
This will produce a new file, tsconfig.json. Open this file in your editor. You will see a list of TypeScript options and some defaults. Note that most of the options listed are within a compilerOptions object. There are a couple of changes we want to make:
Add the following to compiler options:
  "rootDir": "./src",
  "outDir": "./dist",
This tells TypeScript that our source files will be in the src folder and that the output should be generated in the 'dist' folder. The default behaviour is to use the base folder to look for source files and to produce output files alongside the source files.
Let's write some code. Create a folder called src and then create a file calledsrc/app.ts with the following content:
console.log('Hello World');
This looks remaarkably like JavaScript at the moment, but we will change that later.
From the base folder, run:
npm run dev
You should see output similar to:
> acme-project@1.0.0 dev
> ts-node src/app

Hello World
If you do, then you have succesfully used ts-node to compile and run your TypeScript code.
Now try running:
npm run start
You should see output similar to:
> acme-project@1.0.0 start
> run-s build app


> acme-project@1.0.0 build
> tsc


> acme-project@1.0.0 app
> node dist/app

Hello World!
Neat huh? You should now also see a dist folder has been created along with an app.js file inside it.
So far so good.
Let's create some real TypeScript and let's do it in a Test Driven approach.
Before we get to that, Jest requires some initial configuration. We can generate this automatically, by running:
npm run test -- --init
This is an interactive prompt that will ask a few questions before generating the file. Here are my answers:
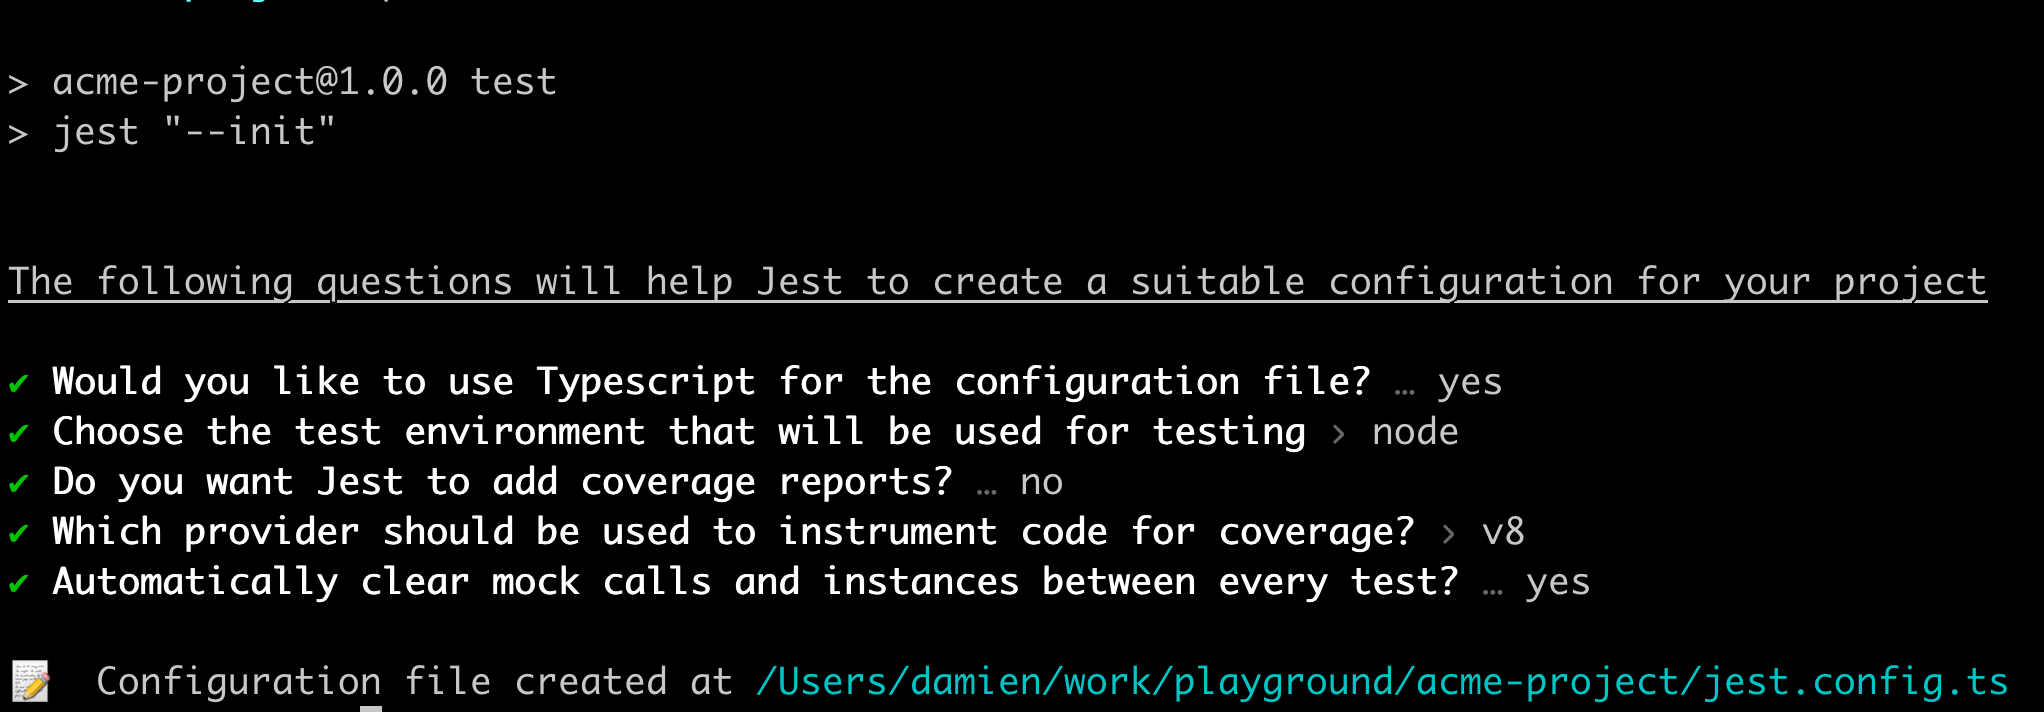
You should now have a jest.config.ts file.
Let's create an app that greets. The initial requirement is that it should output 'Hello World'.
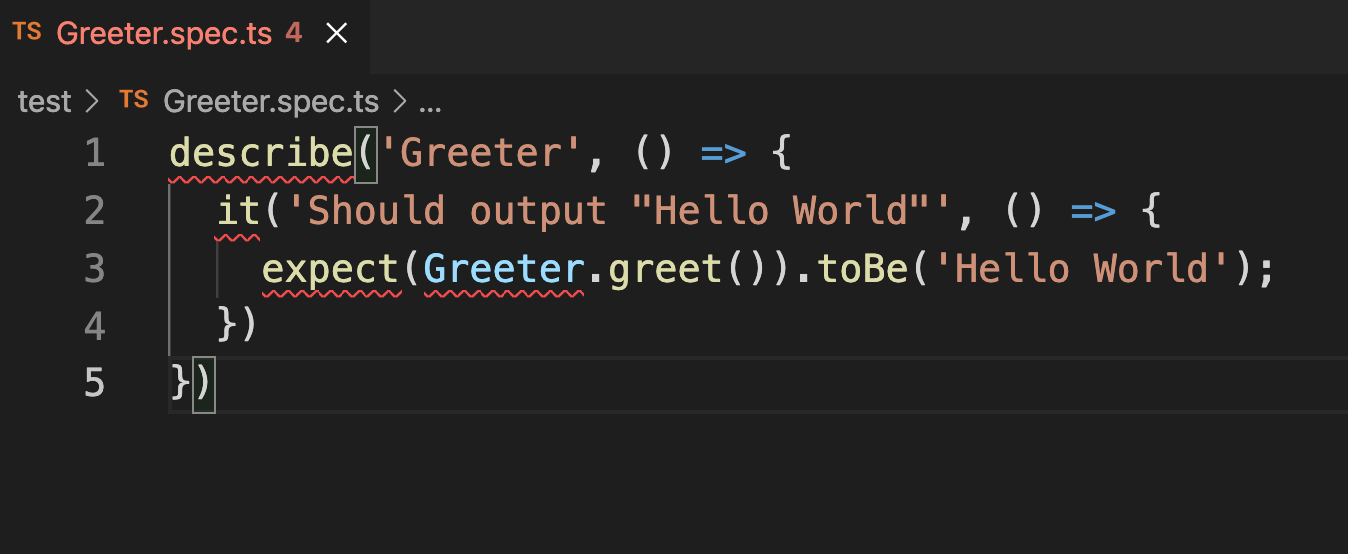
Let's create a test for that. Create a folder called test and a file called Greeter.spec.ts with the following code:
describe('Greeter', () => {
  it('Should output "Hello World"', () => {
    expect(Greeter.greet()).toBe('Hello World');
  })
})
Uh oh...
Visual Studio has built in support for TypeScript and complains about the use of describe, it, expect and Greeter. Hovering over the dotted red-line reveals the following suggestion:
"Cannot find name 'describe'. Do you need to install type definitions for a test runner? Try npm i --save-dev @types/jest or npm i --save-dev @types/mocha.ts(2582)"
Some modules bring their type definitons with them, some don't. Some don't have any type definitions. Jest does and we can install them using the command suggested:
npm i --save-dev @types/jest
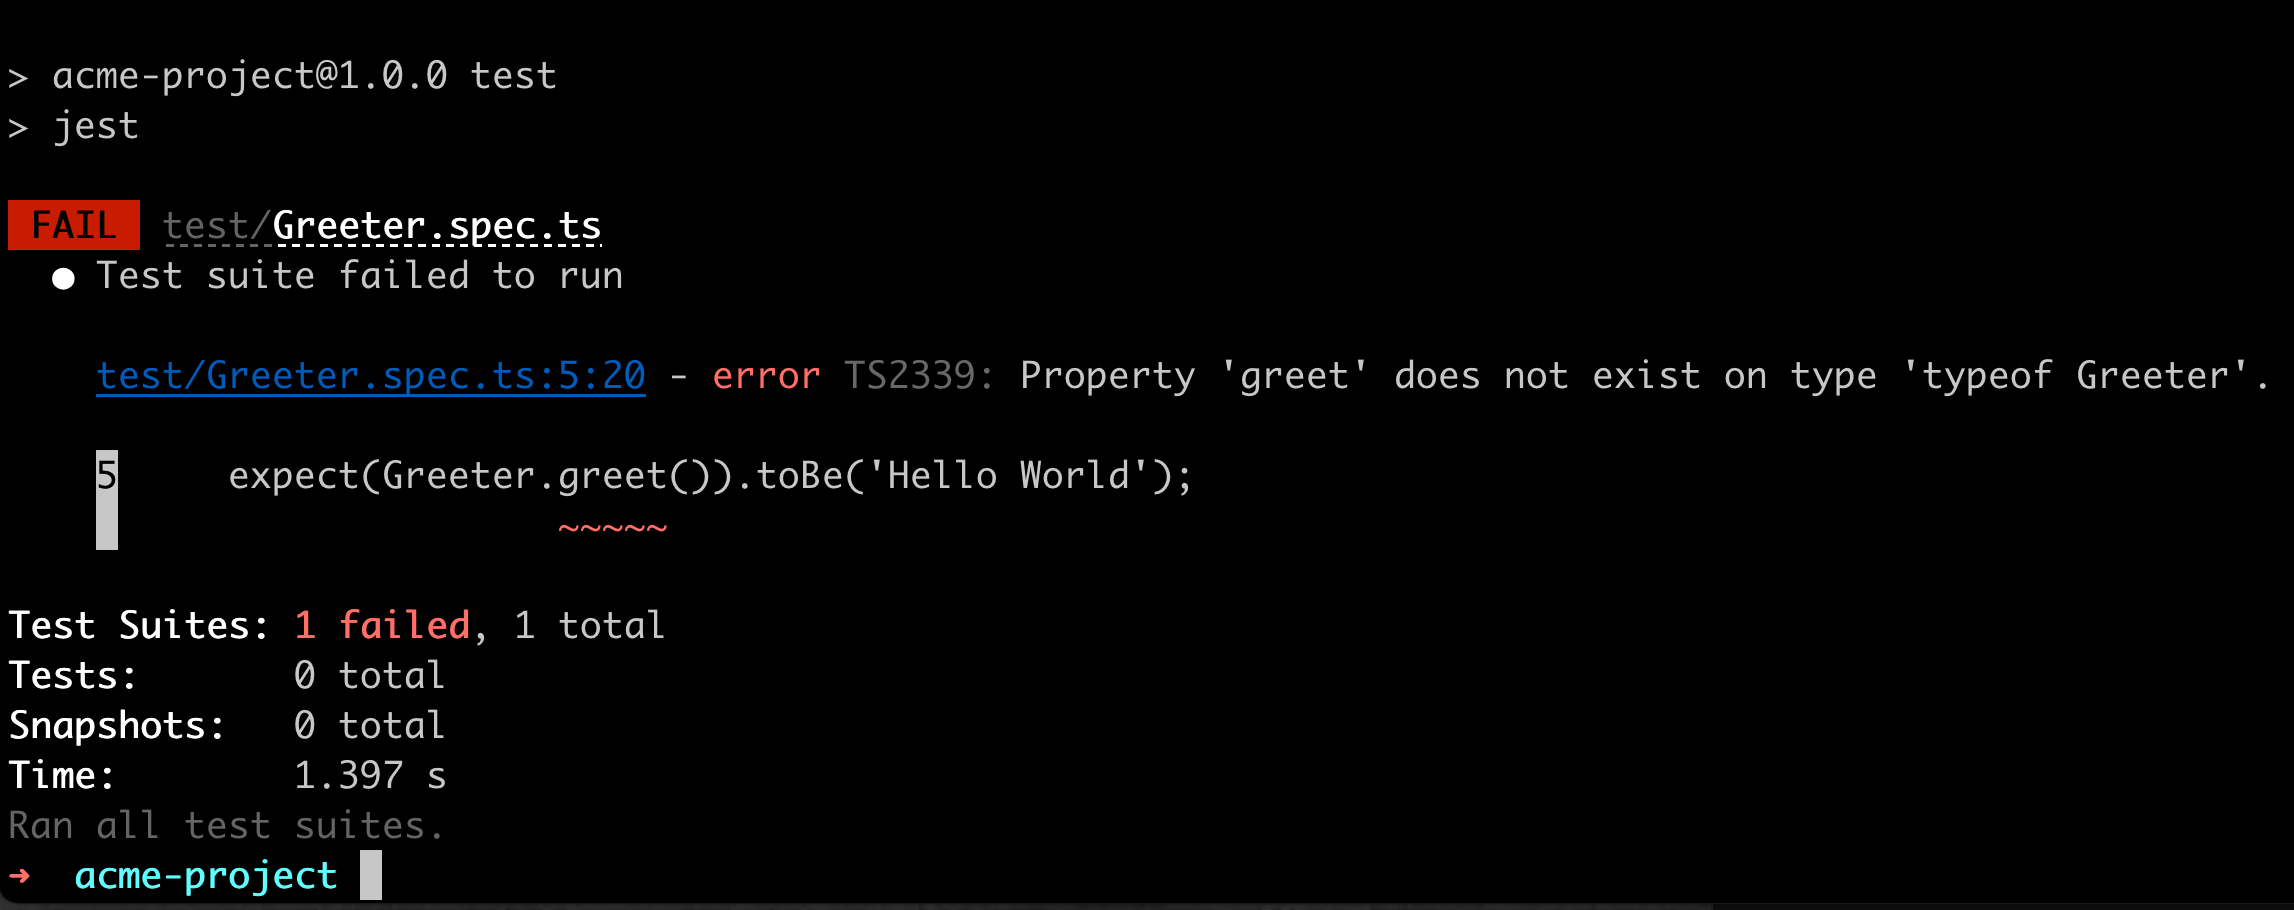
You should now just be left with a suggested error for Greeter. Like good Test Driven Development practitioners, let's run the test anyway and see it fail:
npm run test
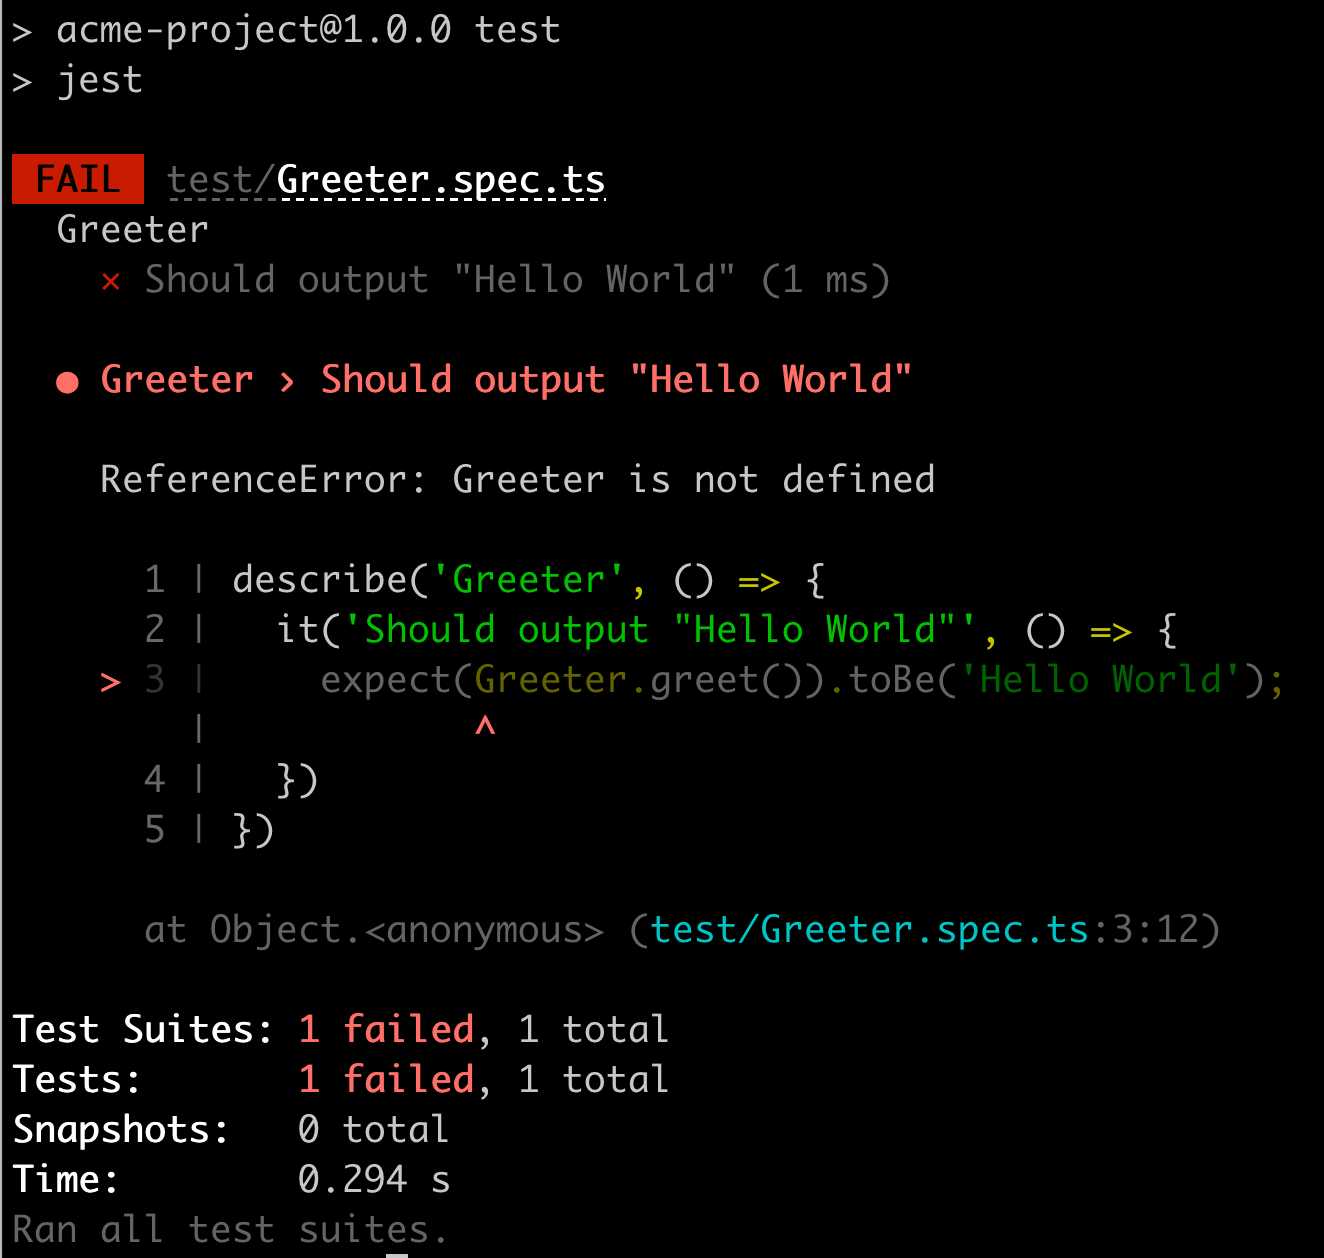
You should hopefully see the test fail similar to the above image.
Create the file src/Greeter.ts with the following content:
export class Greeter{}
Now switch back to test/Greeter.spec.ts and hover over the error. You should have a 'quick fix' option:
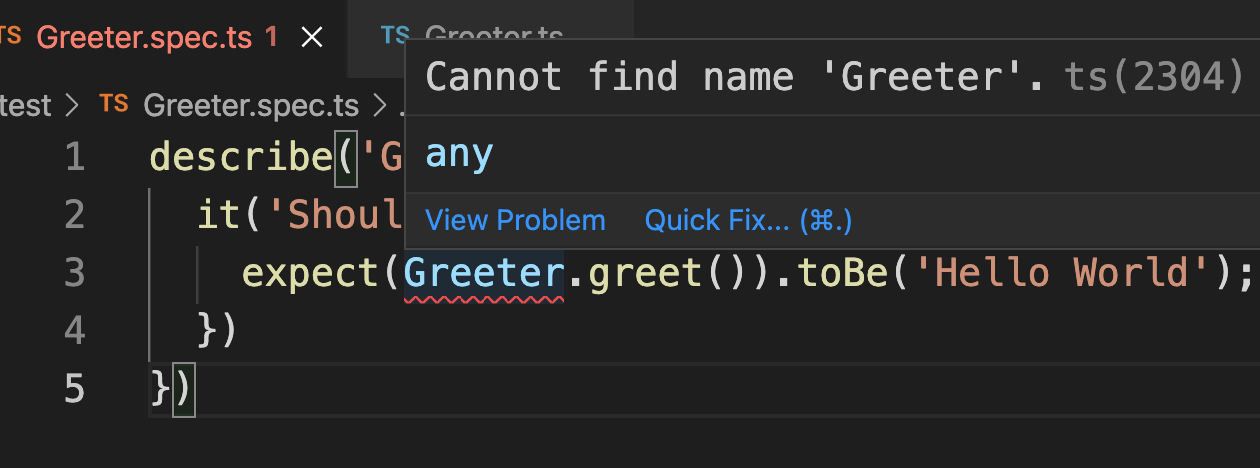
Click on 'quick fix' and select import 'Greeter' from module "../src/Greeter.ts".
The red dotted line should now move from 'Greeter' to 'greet'. The error is now:
"Property 'greet' does not exist on type 'typeof Greeter'.ts(2339)"
We can run the test again to confirm the problem:
npm run test
As expected, we get an error:
Let's fix this.
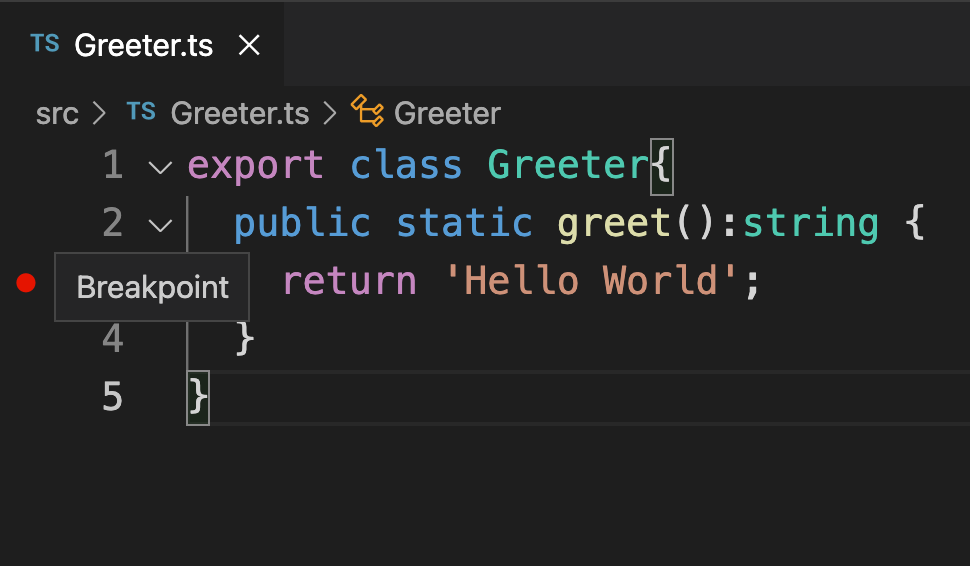
Go back to src/Greeter.ts and change the code to:
export class Greeter{
  public static greet():string {
    return 'Hello World';
  }
}
We have added a new greet method that simply returns 'Hello World'. It is marked as public to show that it is part of the public interface for Greeter. It is marked as static as this is a class method and does not require an object to be created first. It has a return type of string which makes our intentions explicit.
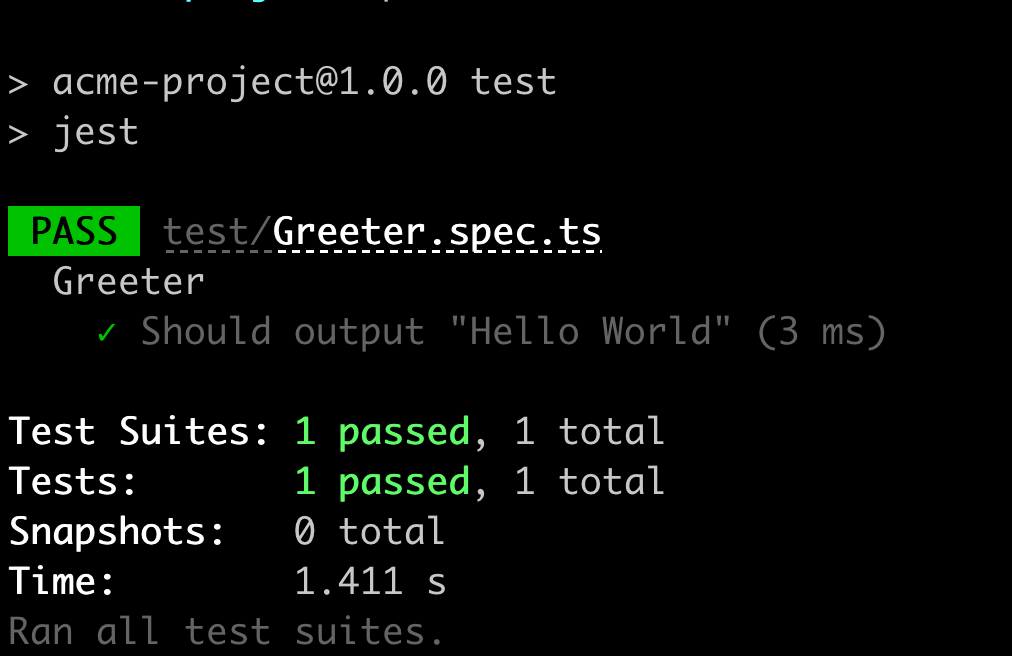
Let's run the test again:
npm run test
And now our test passes.
Let's update our application to use our new class. Open src/app.ts and update the code:
import { Greeter } from './Greeter';

console.log(Greeter.greet());
Now run the dev script to see our code running with real-time transpiling:
npm run dev
This seems to work as before. This is good.
Let's try running the separate build and run phases:
npm run start
Uh oh. We have a problem:
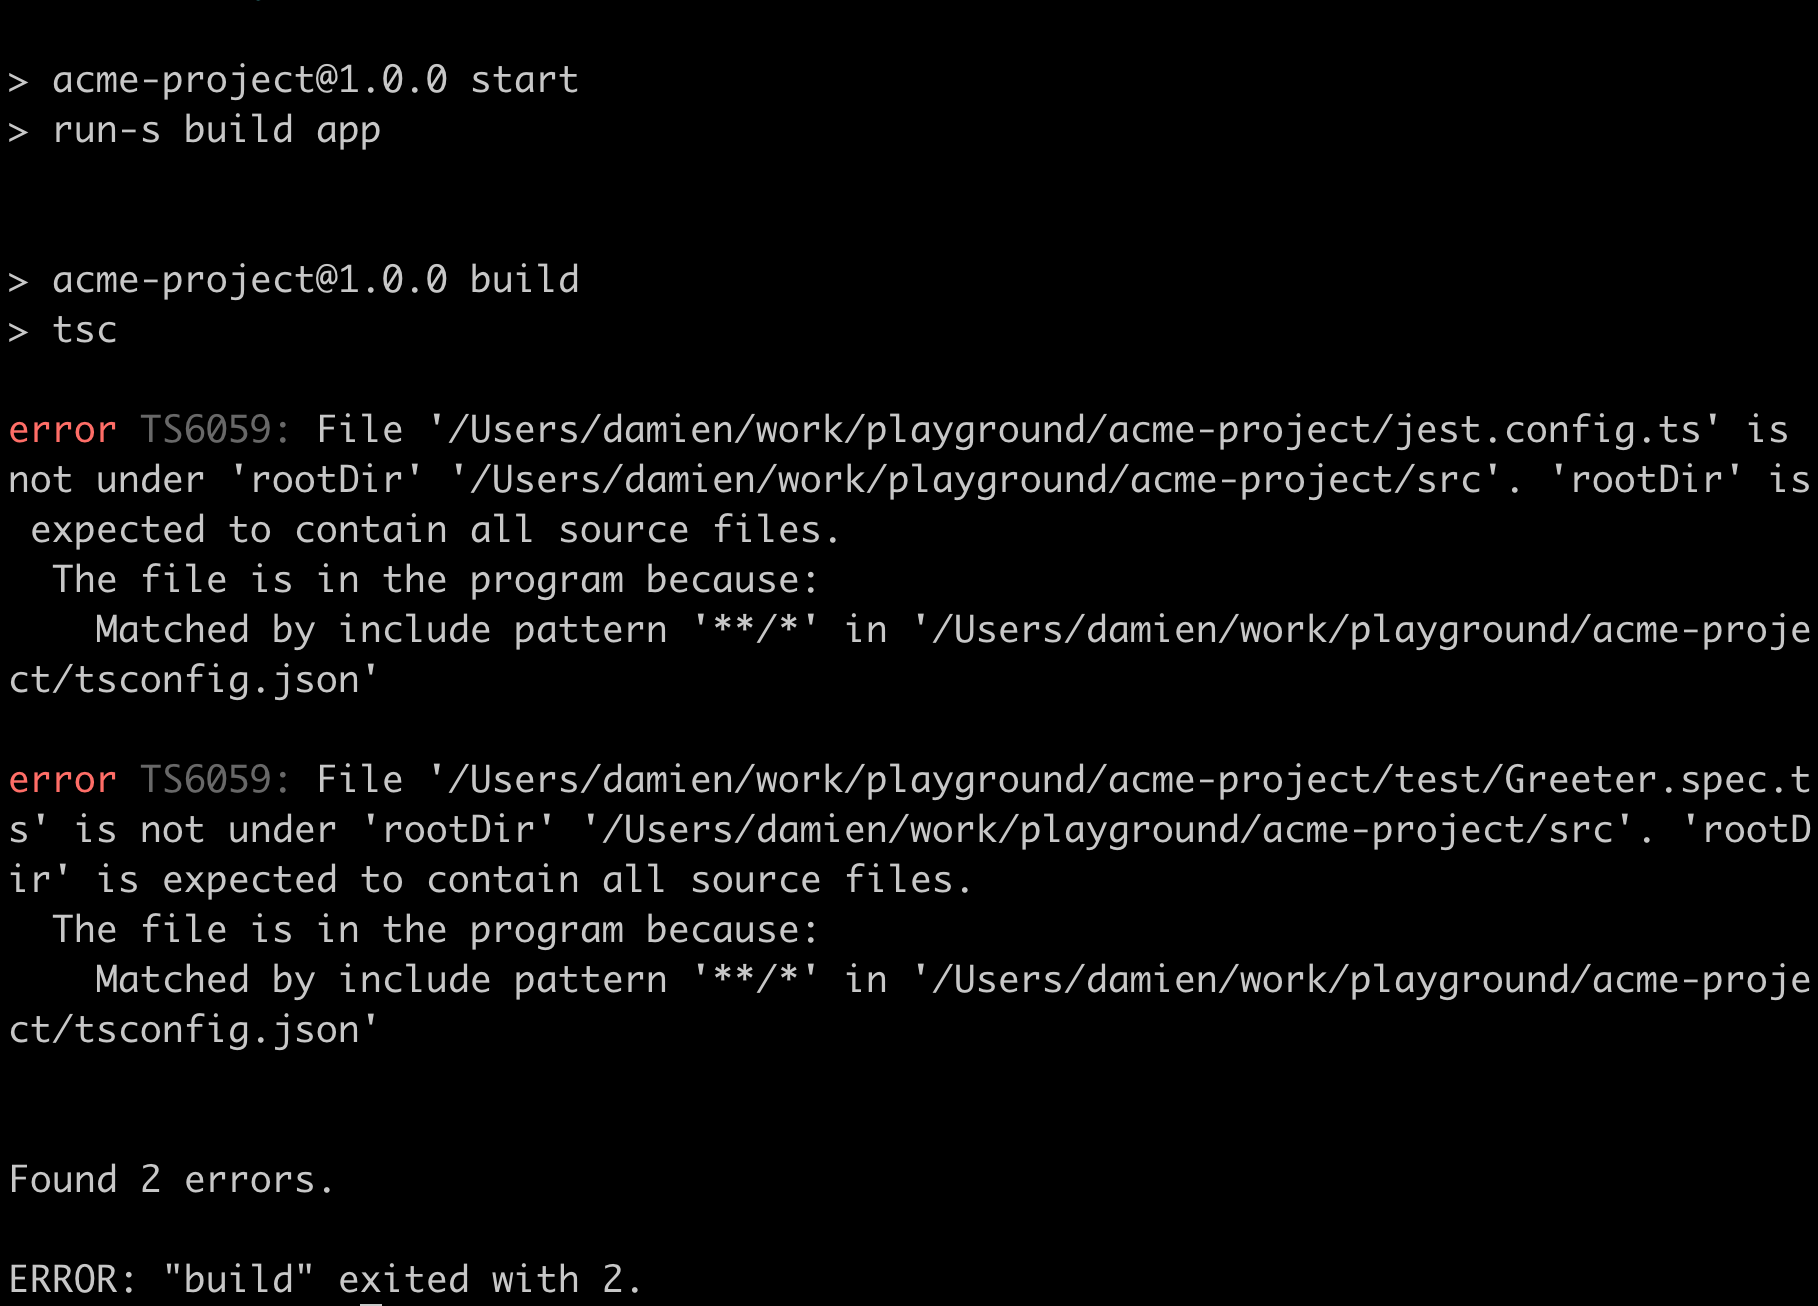
It seems that the tsc command is unhappy about other ts files in the application. We can tell tsc explicitly to only look into the src folder for our source files. Add the following, to tsconfig.json, at the same level as compilerOptions - so not inside compilerOptions:
  "include": [
    "src/**/*"
  ],
You will also note that the attempted build has taken our jest.config.ts file and produced a jest.config.js version! It's done the same with test/Greeter.spec.ts. Delete the js files. We do not need them.
if we re-run the script, the build error should now disappear and the output should be as expected. No additional js files are created.
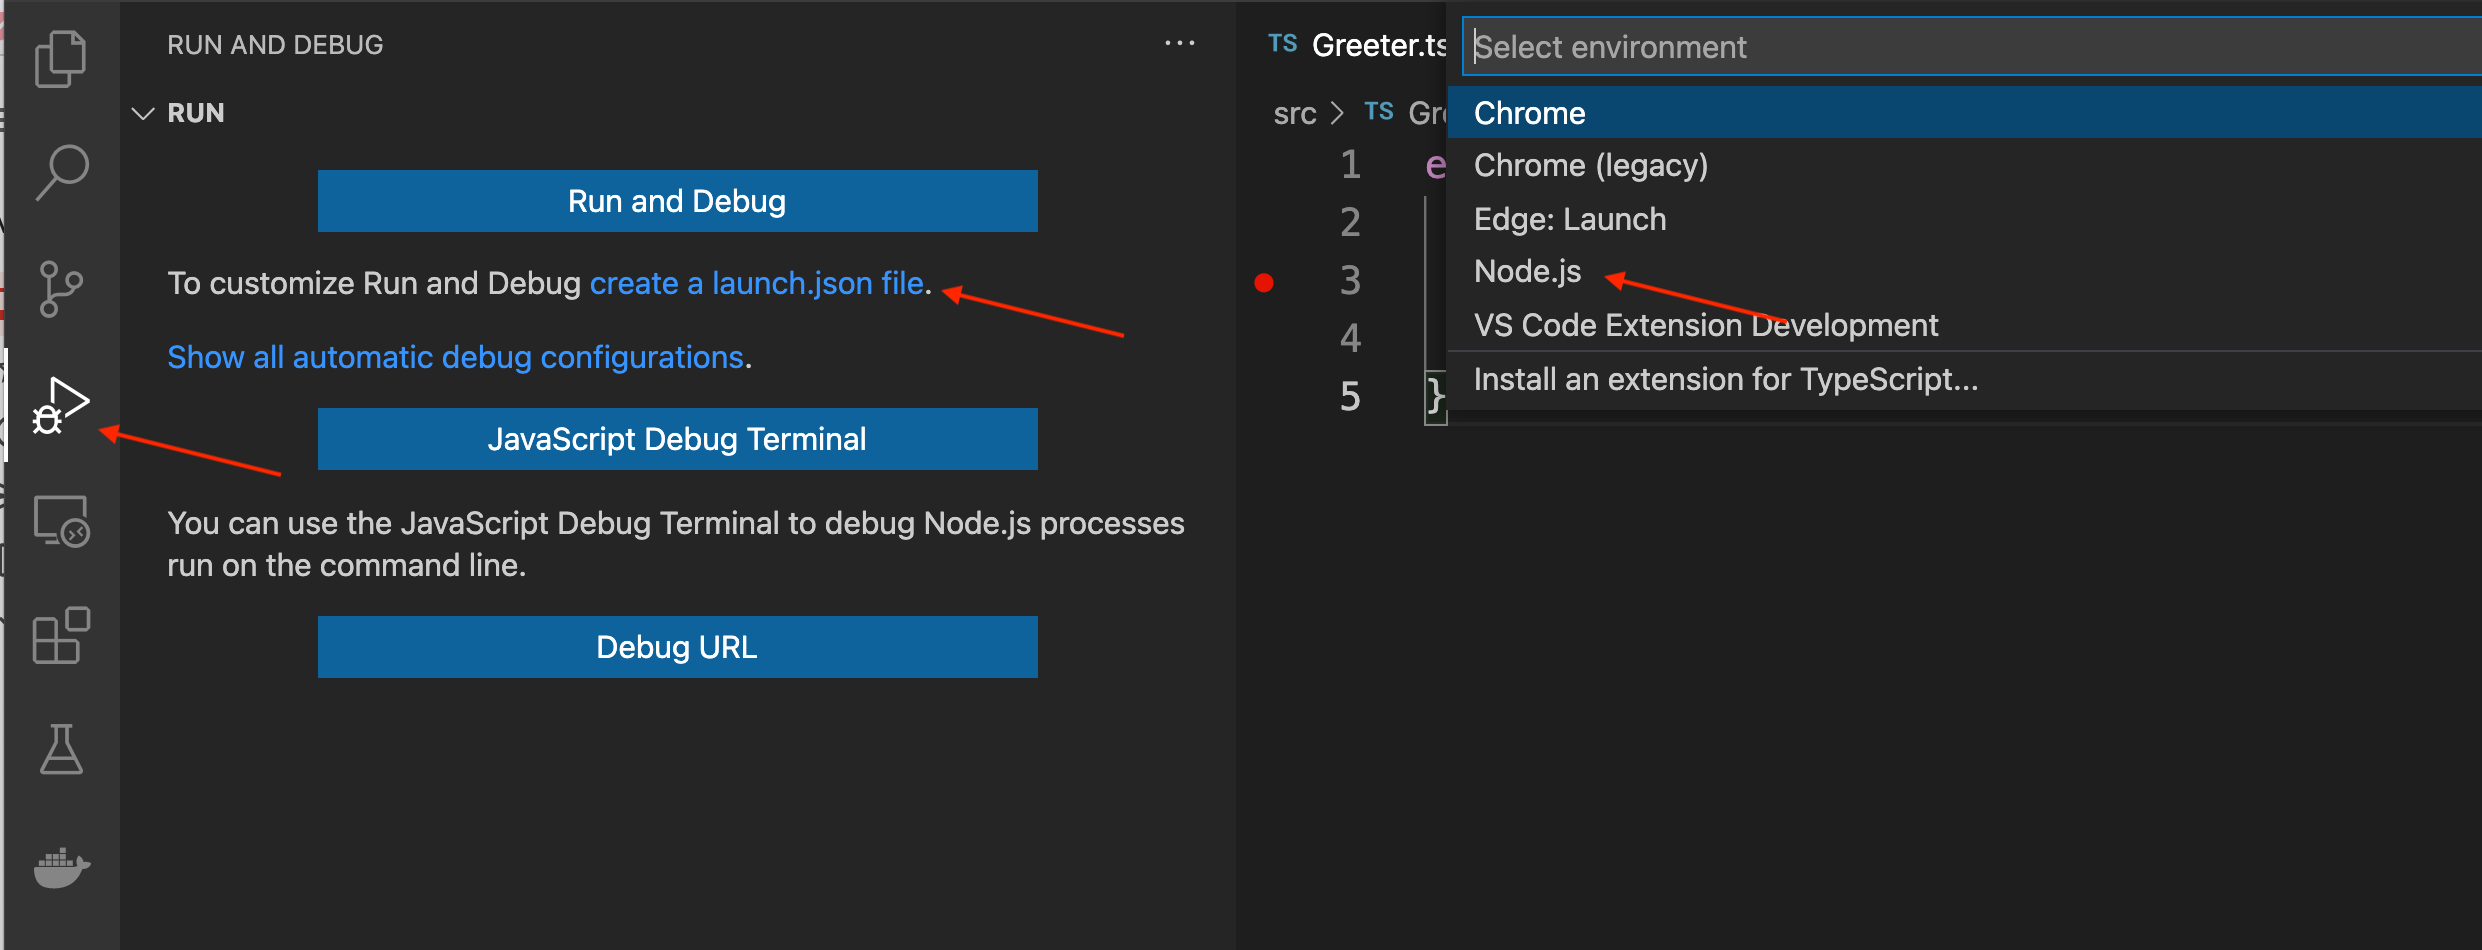
Let's try to debug the running application in VSCode. Place a breakpoint in src/Greeter.ts by clicking in the gutter to the left of the line number.
Now go to the debug extension, select 'create a launch.json file' and then select 'node.js'.
Overwrite the contents of launch.json with this:
{
  "version": "0.2.0",
  "configurations": [
    {
      "name": "Debug ts-node",
      "request": "launch",
      "runtimeArgs": [
        "run-script",
        "dev"
      ],
      "runtimeExecutable": "npm",
      "type": "pwa-node"
    },
  ]
}
This simply tells VSCode to launch the debug with our npm run dev command. We will encounter most complicated scenarios duing development, but this gets us up and running.
Click the play button and observe that the debugger breaks at out breakpoint.

What about our tests?
In launch.json, duplicate the configuration setting and change it to:
{
  "name": "Debug jest",
  "request": "launch",
  "runtimeArgs": [
    "run-script",
    "test"
  ],
  "runtimeExecutable": "npm",
  "type": "pwa-node"
},
So, change the name to "Debug jest" and the runtimeArgs to ["run-script", "test"].
You can run select this new configuration from the debugger selector and click the play button again.
You should observe that, after a short time, the debugger breaks at out desired point.
That's all for now. I might take this small project on a few stages further in the future.